While facing problem with editing, copying or deleting data from your USB, is a data protection mechanism and it prohibits your storage device from modifying. So, if once any storage device like USB flash disk, hard drive or any other SD card is write-protected, then you can’t modify it in any case. In simple words, you can’t add, delete or change any data in it.
If you try to do it, then you received a prompt message “The disk is write-protected”, so you can’t edit it until you disable write protection.
Now the question is that how to remove write protection from USB or form any other storage device? You can do it with both manual or automatic method.
Follow this method to remove write protection from USB, and it’s a quick method with CMD.
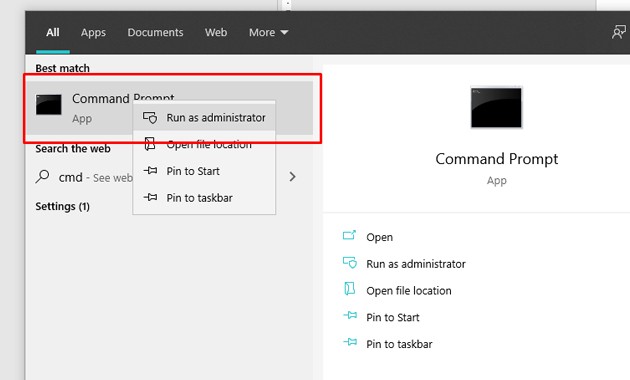
- Run CMD as administrator
- Type diskpart.exe
- Type list disk
- Type select disk + number
- Type attributes clear disk read-only.
These methods are useful for removing write-protection, and it is not affected by your data lost.
Read also: How to Disable Avast Antivirus?
Use physical switch method to remove write-protection:
- Check the switch on your USB or SD card.
- Use this physical switch from ON to OFF and unlock the device.
- Insert the USB or SD card in your computer
- Access all data from the stored device
Put on Diskpart Command to Disable Write Protection
- Press “Win + R”, type cmd to open “Command Prompt”.
- Type diskpart and hit Enter.
- Type list disk and hit Enter.
- Type select disk 0 and then replace 0 with the write-protected device number and press Enter.
- Type attributes disk clear read-only and hit Enter.
- Type exit to close the diskpart window and when the write protection removing process is finish.
Read also: How to Speed Up a Slow Laptop or PC?
Run Third-party Write Protection Removal Software
If you’re more professional with computing, then you can use this auto method to remove write protection:
- Download and install EaseUS Tools M for free.
- Run EaseUS Tools M on your PC
- Select the “Write Protection” mode.
- Choose the device which is now “Write-Protected.”
- Click “Disable” to remove the protection.
Use Turn Off BitLocker Partition in Windows 10/8/7
- Open File Explorer, right-click on your BitLocker partition or storage devices
- Choose”Manage BitLocker”.
- Choose the locked device and Press Turn off BitLocker.
- Wait for BitLocker to decrypt on by itself.

